|
Calculating Shunt Values
and common metering circuits
The most common failures in old D’Arsonval meters that have not been wet,
subjected to grossly excessive current, or otherwise physically damaged relate
to bad electrical connections.
Remember when you dismantle the meter, work in a clean lint-free location. No
dog or cat hair, and especially no steel or iron shavings! The following DX60
meter measured open and did not deflect.
There are two electrical paths. The rear regulator has a wire directly
soldered to it, and that regulator is soldered to the hairspring. The hairspring
makes a connection to the motor coil, which is also soldered. There is not much
chance of a bad connection here.
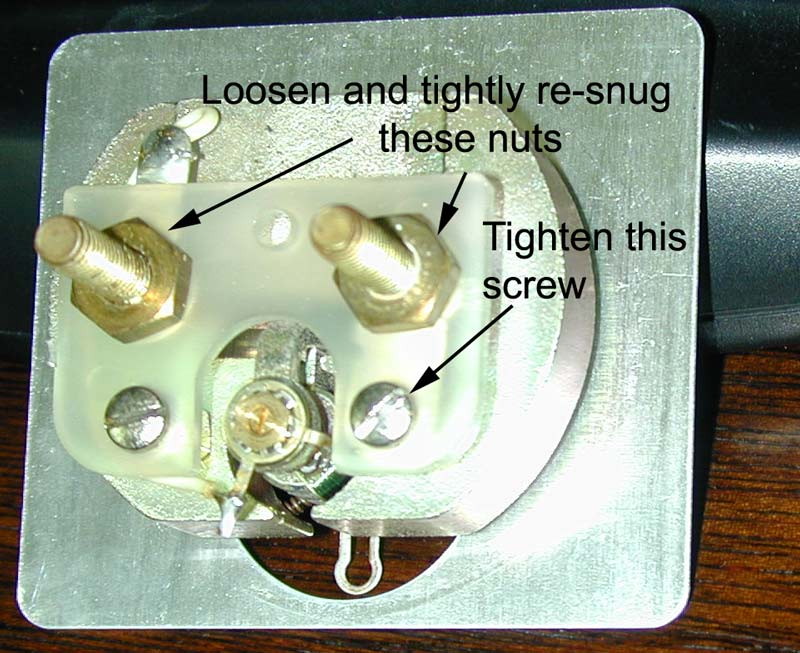
The locations for bad connections are pressure connection points. They would
be the two meter studs and the small screw. Securely tighten these three points.
The remaining slotted head screw can be checked for snugness. Unless it falls
out, it is not a problem.
Do NOT adjust or move anything else! Do not get trash in the meter movement.
After snugging these three points, this meter started to work. It measured
about 65 ohms.
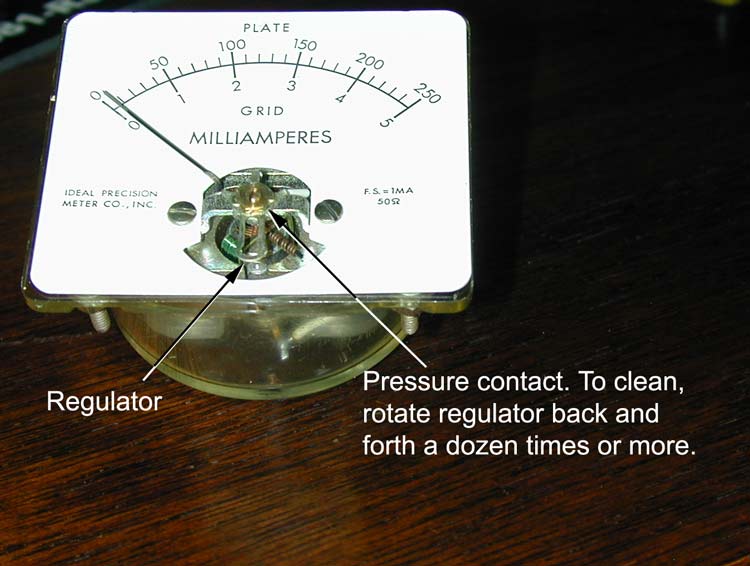
In the front area, the front regulator is solidly soldered to the hairspring.
The hairspring makes the electrical connection to the motor coil.
I dropped some liquid WD40 on the pressure contact area with a wooden
toothpick. After wetting the area of the nut, I moved the regulator arm back and
forth a few dozen times. I reset it to the original position so it would line up
with the plastic adjustment post stub in the meter front.
After cleaning this contact, this meter read 50.3 ohms!
Do not adjust anything except position of the regulator
arm.
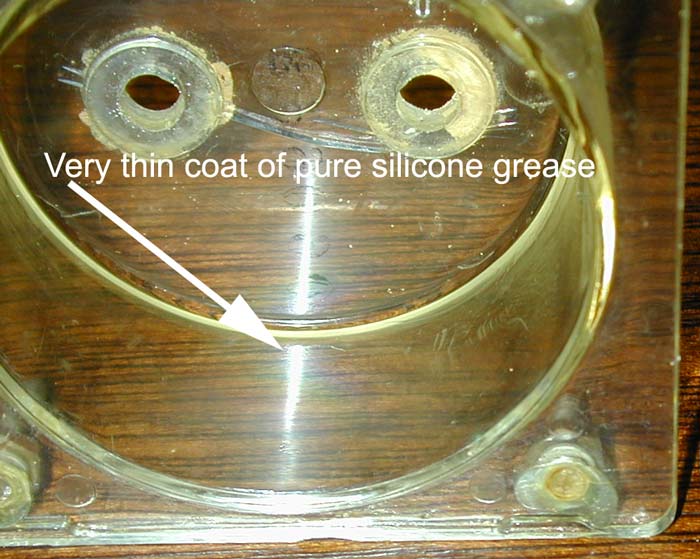
I thoroughly cleaned the inside of the case by blowing it out with air. I
wiped it down with a clean tack cloth.
I put a very thin layer of high viscosity pure clear silicon grease near the
back bottom, and also around the meter terminal screw holes AFTER completely
cleaning the case. This will help trap any debris or dirt I missed, or anything
that gets knocked loose during assembly.
Notice all the small white dots. This is trash from the deteriorated meter
seals where the two large connection studs go through the plastic. A light coating of thick 100% pure silicon grease
on the holes will serve as a good
seal, and trap any loose particles I could not scrape away.
Scotch tape works to pick up debris.
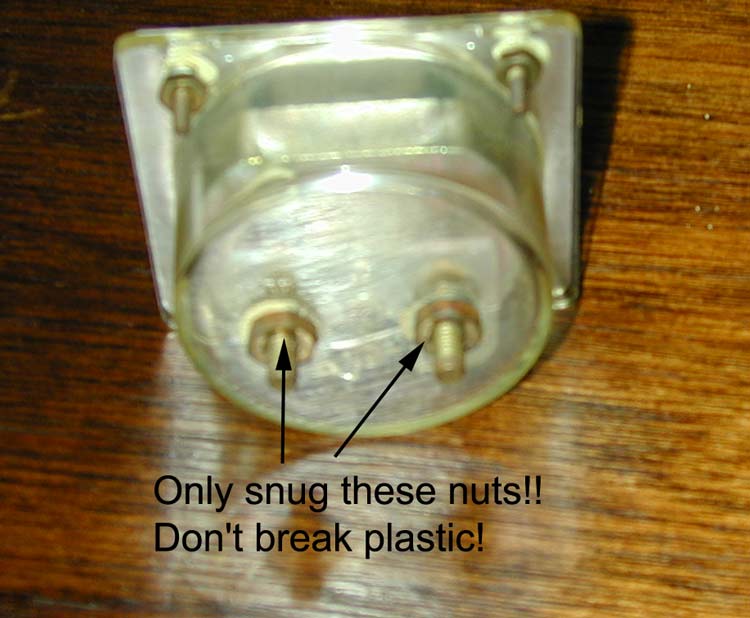
Only snug the rear outside nuts. The plastic won’t take much torque. This
meter case was already cracked before I opened it.
I sealed the crack on the OUTSIDE only with super-glue applied with a
toothpick.
Boatanchors
|

